Dutch braid, French braid inside out (on the contrary), back-to-head, tucked or back braid - as soon as it is not called! All this is the name of the same weaving, which is in its essence another variation of the three-strand braids. All the difference is that each new strand is added from below, under the braid, in fact, therefore weaving has such names. In addition, the spit outwardly noticeably differs from the usual spit in its relief, convexity and volume.
Weaving can be used as an independent hairstyle, or as a basis for creating new images. If you add a braid with beautiful hairpins, bows, various accessories, you get a completely different, unique image. In addition, variations of performance in themselves make it possible every day to look different. A braid can be woven on its side (from right to left and vice versa), either from the back of the head, high, from the fringe itself, or at the very bottom. Where exactly the braid will be located is a matter of taste and convenience of its execution, but the weaving technique is always the same and consists of the following steps.
Weave Dutch braids in stages
- Preparation - careful combing from all knots, may require conditioning treatment for styling so that hair does not fluff,
- Selection of strands of hair there, where the spit will start from,
- The strand is divided into three,
- The weaving begins with the introduction of the right strand under the middle, and the left under the right,

how to weave a reverse french braid pattern
- On the right side of the bulk is separated part of the hair and, together with the right strand of the braid, held under the middle.,

weaving inverse french spit photo
- Next to the left strand of the hair is added to the left side, and also weaves under the right,

french braid on the contrary photo
- Weaving continues the same way with the addition of strands from the right, then from the left side of the head and leading them under the central part of the braid,
- When the whole mass of hair is woven, the process continues as in the usual braiding of three strands,

how to weave a back braid photo
- The remaining tip of the hair is fixed with a small rubber band,

how to weave a French braid on the contrary photo
- Dutch braid ready!

how to weave a Dutch braid in stages

Dutch braid how to weave a photo
There are literally a few touches - not complicated, but very important. To give volume and a finished look to the whole hairstyle, the braids are stretched. To do this, each loop braids on the right and left gently sip to the side. If the hairstyle is done on short hair, then you will need additional stealth, to secure embossing strands. For final fixation, the hair is slightly sprayed with varnish. Now you can consider the hair finished, but, as already mentioned, additional jewelry is welcome here.
They allow you to give the right mood to your image, be it gentle-romantic or boldly bold.
How to braid the French braid on the contrary. Step-by-step instruction.
To make the hair more docile and smooth, they apply a special styling agent (mousse or foam). The weaving scheme is not complicated, but patience and attentiveness are required from you.
- Separate the hair at the crown. The thicker the strand is selected, the longer our spit will turn out.
- This strand is divided into three equal parts. Make sure that your hair is not confused, then the hair will be more accurate. Conventionally, the divided parts are denoted as: right, left and middle.
- The left strand is shifted under the middle.
- Now the right strand moves under the middle one.
- Further strands of loose weight of hair are interwoven into the hair. To do this, take a thin strand on the left and add it to the main left strand. The resulting strand is placed again under the middle.
- We make the same maneuver on the right side.
- So, picking up strands, we weave our braid to the end.
- Upon completion, the hairs smooth and fix varnish for reliability. To hairstyle looked more voluminous, before sprinkling with varnish, you can pull up the loops of the braid.
Pigtail on the contrary - weaving instructions

In just 10 minutes you can create beauty on your head with your own hands. A scythe on the contrary is very simple to do. This is the weave of the usual classic braid, but only vice versa. All strands must not be woven to the top of subsequent ones, they must be woven, on the contrary, under strands. Here you have the explanation of the name "reverse pigtail". Such a pigtail is also called “backwards braid” or “inside-out braid”.
So, what we need for weaving:
- massage comb,
- an elastic band (the quantity depends on the chosen weaving option),
- hair spray,
- and, of course, desire.
The French braid is probably the easiest type of braid weaving. We learn to weave it the other way around. After reading the instructions, you will be able to see how to weave the braid on the eversion on the video.

1. We well comb our hair, and just like when weaving a standard French braid we collect a small bunch of hair on the top of the head (or at the top on the sides for weaving two braids). Divide the bundle into three equal strands. They, by the way, can both small, and large. It all depends on what result you want to see - experiment and choose.
2. Take the left strand and gently hold it at the bottom of the middle so that it is between the middle and the right.
3. Next, take the right strand and place it under the middle again, so that it is again between the middle and the left.
4. We start the second run again from the left strand, but with each binding we grab small locks of hair from each side so that the braid is firmly attached to the head. This allows braids to hold firmly on top of the head and look aesthetically pleasing.
5. Do the same for the same principle.
6. After each binding, try to tighten the braid tight enough so that it eventually looked exactly and held for a long time. As you can see, there is nothing difficult in weaving inside out, and now you know how to weave a braid for eversion.
 Next, to add volume, stretch all the edges of our braid. We do this evenly so that the hairstyle is neat. If you like a small "mess", then you can do it more carelessly and unevenly. With the appropriate style, such a "shake" on your head will look very relevant.

Spit around - video
First, we specially described for you in detail how to weave. Now we will show you clearly how to braid the braid on the contrary on the video.
And so, now having read the instructions in detail, having viewed it. video - spit on eversion, you can start practicing and “stuffing” your hand. Believe me, it will not take a lot of time if you can make an ordinary spikelet or even a standard Russian braid.
Types of hairstyles for different cases with the use of braids on the contrary
Life is such a thing, it sometimes turns that way, and there is no time to gather for an important event. All sorts of hairstyles with a scythe inside out will always be your lifesaver. The prevalence and diversity of braids knows no boundaries, and you will definitely be the center of attention at any celebration and just on a typical day.
The braid can be executed both in a strict form for school and, for example, playing sports, and in a festive variant. Even the same weaving can be done for different occasions, it all depends on the performance, the need and your creativity.
1. The fish tail is the opposite


Weave such a pigtail a little longer than the French braid, on the contrary, due to the fact that it is necessary to weave it out of four strands, although it is not at all complicated. To make your work like a festive look, you can decorate the braid with beads, rhinestones
2. Back French braid for special occasions
Below you can consider our options. Hairstyles are very simple to perform, and will not keep anyone interested, both the weaker and the stronger, wait for themselves to follow.
How do you like such an unusual and spectacular version of the hair gathered up? Looks great.
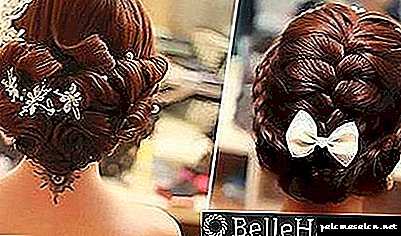
Or gentle charming wedding options for weaving and decoration.


The bride will feel like a real goddess and the first girl of the fabulous day of her wedding.
3. Graduation
What beauty will not go to the prom with a full parade? Naturally, every girl wants to be the best and most beautiful this evening. We offer you a couple of ideas on how to weave a pigtail on the eversion for a prom:


Or alternative, but with flowing hair:


4. Reversed four-strand braid
It looks original. Weave it a little harder than the classic French braid on the contrary. This option is also suitable for any occasion. But here you will need to practice before quickly to make express hairstyles from this weaving.


Well, needlewomen, now you know how to weave a reverse braid of four strands.
It remains the case for small in the presence of the desire - to learn and practice.
Little tricks
Hairdressers and hairstyles shared with us the tricks and secrets of weaving back braids. We, in turn, collected the existing material with a new one, and made a list of recommendations for successful weaving:
- To
 Your hairstyle has become an ornament of the image that has taken place - remember that all manipulations over the hair must be done after washing them. On dirty hair do not even try to create something.
 - Radical bouffant will not be superfluous. Hair will be more voluminous, and the proportion of the face will look right.
- A small or large stretch of strands from the braid lends not only the splendor of the twisted spit, but perfectly sets off the thin girl's neck.
- When you weave yourself, you need to watch how your spit lays down. It is desirable to have an improvised second mirror.
- If you are unable to weave the braid inside out evenly, you can do it diagonally, or in a zigzag. The main thing is that all weaving on the head should be smooth and not broken.
 Your hairstyle has become an ornament of the image that has taken place - remember that all manipulations over the hair must be done after washing them. On dirty hair do not even try to create something.
Here our express training has come to an end. We are sure that now you know exactly how to weave an inverted braid. Train and improve your received hairdressing skills. Love yourself, delight with new transformations. Let all the rivals and enviers be left far behind. And most importantly do not hesitate, you will definitely be noticed.
Classic French braid
The basic principle of French weaving is the gradual interweaving of additional small strands into the main 3 strands. Before you start creating hairstyles, we advise you to sprinkle your hair with water, moisturize them, and thoroughly comb. After that you need to comb your hair back. Owners of fine hair is better to give the volume of hair, making easy bouffant. If the hair is thick, this is not necessary.

How to braid the most simple French braid
- Weaving begin with a large bundle, which originates from the forehead. To give a spit a volume effect, the thickness of the initial strand should be larger, and if the spit is thin, take a thin strand.
- This initial strand is divided into 3 parts, they need to be weaved and crossed between each other as with ordinary weaving, weaving into these three main strands additional bundles of hair located on the sides of the main bundle.
- We begin to weave an additional strand, located on the right side of the right third of the main strand.
- The larger part of the right side of the large strand must be twisted with the middle part.
- It was the turn to weave an additional strand into the left side of the main strand.
- Next, the enlarged left strand is interlaced with the middle part of the large strand.
- We repeat all the actions, weaving in the main strands new beams, located to the right or left of the main ones (respectively).
- After weaving, the hair must be fixed. To do this, use a barrette, rubber band or hairpin.
To better understand how to braid a French braid, watch the video tutorial:
French braid with woven ribbon
To make the braid more attractive, we recommend weaving the ribbon into the French braid. Use of tape from any suitable material is allowed. The main criterion - its color should be in harmony with the color of the dress and the color of the eyes. Weaving a braid with a ribbon is no different from the "classic" version of weaving, there is only one significant exception.

As soon as the hair will be combed, and the selected main strand will be divided into three parts, under the formed central strand you need to stab the ribbon with the help of an invisible one. Next, you must continue to weave already with a ribbon. The tape should lie flat, without kinking and twisting.
French braid on the contrary with the beam: step by step instructions with photos
This hairstyle is also called "Dutch braid". We advise you to start weaving this option hairstyles only after mastering the classic version of weaving. In addition to some of the skills and combs, you will also need accessories: hairpieces and hairpins.

- Bend your head, chin down, moisten and comb your hair.
- Weaving begins with the division into 3 parts of a small tuft of hair at the back of the head (closer to the neck). The remaining hair on the sides is gradually interwoven into 3 main strands. The main difference from the "classic" option - strands are sent down, not up, as in the "classic" version.

- Start ordinary weaving - braid the right strand under the middle one, then do the same with the left strand.
- Collect a small strand on the right side and braid it in the right main strand. Further this increased strand braid under the middle strand.
- Do the same with the left main strand.
- So, gradually weaving the side strands, the braid is formed up to the crown.

- After completing the weaving, the hair must be gently combed with a comb.
- With the help of gum decorate the horse tail.

- Choose a chignon that matches the color of your hair, around which you need to twist the remaining hair. That hair did not scatter, they need to be fixed by means of a hairpin.

History, relevance, style
 French braid can be safely called one of the most popular hairstyles. The huge variety of its types allows you to create a unique stylish look. In this case, you will look equally elegant, regardless of whether you braid the braid on a business meeting, a party or just for a walk in the park.
From where exactly this style of weaving, like the name, has gone is not known for certain. Perhaps the authorship belongs to the French hairdressers, and therefore the braid is also French.
 Manipulations with the selection of strands from different sides are called weaving with pickup, which allows you to create more sophisticated and beautiful variants of braids. Click on the photo or highlighted link to find out the weaving: with upper, lower or 2-sided pickup.
The ability to weave braids is useful when creating a donut. Secret techniques of all methods are described.
here
Anyone who wants a chic volumetric braid, but without weaving, we recommend to learn how to braid tails with rubber bands in detail on the link here.
How to weave?
Weaving Technique, today, there are many. The basis of all of them is the same - the classic French braid. She weaves the classic or new methods with the use of hairdressing tricks.
If they are naughty, leave them slightly damp, or use styling products. Mousse, gel and hair wax will make curls softer and more pliable.
Weaving scheme
You will need: comb and gum.

- Comb your hair thoroughly. Divide it into 3 equal strands. Take the divided strands in your hands. The two extreme strands in the hands, and the middle remains free.
- We put the right part on the central.The middle one is already extreme, we hold 2 strands with our left hand. The extreme left strand is with 2 fingers (nameless and little finger), and the middle one is with the middle. The thumb does not allow the strands to fall out. At the same time, the index finger is straightened.
- The tighter you hold the strands and fix the tension, the tighter and tighter your braid will be. Watch the tension of the strands all the time.
- Put the left strand on the middle part, picking up the middle finger of the right hand.
- When the first crossing of all the strands is done in turn, as described above, the operations must be repeated further. If you find it difficult, just repeat: the right strand on the central, the left strand on the central and do everything by hand.

Detailed step-by-step video on weaving braids:
Any voluminous things will do, for example, children's tights or doll hair, it is not necessary that they are long, the task is to work out the weaving technique itself.
On the parietal zone with grabs lags like this:

- select a rather large strand on the parietal part of the head,
- divide it into three equal strands (enter the index and middle finger in the strand),
- shift the outer strands to the center one, alternately right and left,
- having made 2 weaves, start adding thinner strands to the main strands.
When the braid reaches the base of the neck or all hair is selected, continue to weave further if desired, or fasten the braid at this level.
For fixing, you can use tape or elastic.
The result of this weaving look at the photo. 
 Decided to choose a braid to school or kindergarten?
We offer to familiarize yourself with one more material in order to learn how to make a haircut to school itself in 5 minutes.
How to apply weaving for a festive hairstyle? We suggest you look at the weaving with a ribbon to the costume of the Christmas tree or as an option of exquisite styling on the matinee, all models of weaving, as well as video with instructions, are waiting for you here.
Often in school and kindergarten, in addition to positive moments, there are well-known difficulties. As a result, many parents want to know how to get rid of lice and nits for 1 day forever, detailed in this material.
What is the difference between weaving on oneself and on another person?
To braid the braid yourself on another person, it is enough to understand the scheme and principle, so you will get a good result from 1 time.
Splicing on someone is easier because:
- both hands are free and you keep them in a comfortable position
- you see at once the whole picture of weaving,
- you can easily straighten or remove weaving defects,
- just tighten the braid tight or loosen, it is easy to adjust the tension of the strands,
- hands do not have time to get tired, until you reach the place where you need to tie a gum.
To get the same kind of braids on yourself you need:
- 2 large mirrors facing opposite
- training and ease of braiding the braid, without hesitation,
- comb and other necessary accessories to put next to not move once again to the side,
- carefully train your hands so that they do not have time to get tired of 1 pigtails on themselves,
- accept the help of loved ones, if they can help,
- do on unwashed hair.
Video with tutorials on weaving a French braid on another person:
Detailed step by step video instruction in Russian, how to braid the braid itself
On the contrary or vice versa

french braid
The reverse French braid has become popular in recent years. It looks stylish and original, and trudges a little harder than the classic.
The principle is the same as that of the classic braid, and the difference - the strands should be laid under the middle strand.
The preparatory stages are the same as in the classic French spit.
- Separate 3 strands.
- We put the extreme strand under the central one.
- Another extreme under the central.
- We begin to pick up on the thin strands from the side and lay under the center.
- Repeat the operation until we reach the base of the neck.
- At will, we continue weaving under the central one without picking up the strands.
Video instruction weaving backspit on another person.
Detailed video tutorial weaving reverse French braids on yourself.
Many believe that the traditional French braid braids, not exactly vertically, but slightly obliquely. From the location of the technique does not change, you can weave both classical and reverse French braid.

french braid with ribbon
How to make a braid with a ribbon will be studied in detail in video tutorials and thanks to the step-by-step study you will be able to master the skill faster.
Teaching step by step video on weaving braids with ribbon

Charming hairstyle, which is like the girls who follow fashion.
To braid the braid - the bezel, you must:
- to separate a part of hair along the growth line,
- the parting will be from ear to ear
- the rest of the hair is not involved in the hairstyle, collect a rubber band.
- The principle of weaving the reverse French braid, when the side strands fit under the center.
- We add strands on one side only (bottom), in the process of weaving we select thin strands and weave them into a braid.
Instructions for weaving braids bezel on another person
Weave the rim on yourself, detailed instructions in the video.
Pre-lubricate the hair with wax or use mousse, so weaving a braid is easier, because the strands will not fall out.
When the braid is braided and there are no strands to add, fasten it with an elastic band, or leave it without fastening.
Dissolve previously collected hair. You will get an original, gentle image.
Another option is to add the braid to the end, and then gently twist it at the base of the previously tied tail. We hide the tip under a beautiful rubber band or hairpin, or simply fix it with stealth.
With a braid rim we do another hairstyle. From the tail to form a beam, the base of which is also braided obliquely. Detailed instructions here.

french spit waterfall
Incredibly beautiful hair, which will suit the owners of hair of any length. Its feature is the ease and simplicity of weaving. It is ideal for a gentle, sensual and romantic girl, suitable for those who do not like hair to fall on the face.
Classic version of the French braid
This fashionable hairstyle is great for thick and sparse hair.
Step 1. Combing and well combing thin hair at the roots.
Step 2. We take a strand from the face and tie it with a rubber band (silicone, hair color) - this will facilitate the work.

Step 3. On the sides we select two more parts of the hair and make a binding, as for an ordinary pigtail.


Step 4. On both sides, grab new strands from the total mass of hair and weave them into a braid.

Step 5. Repeat this action to the base of the neck.

Step 6. After all the sides of the hair are woven into a pigtail, we finish it in the traditional way and tie it with an elastic band.

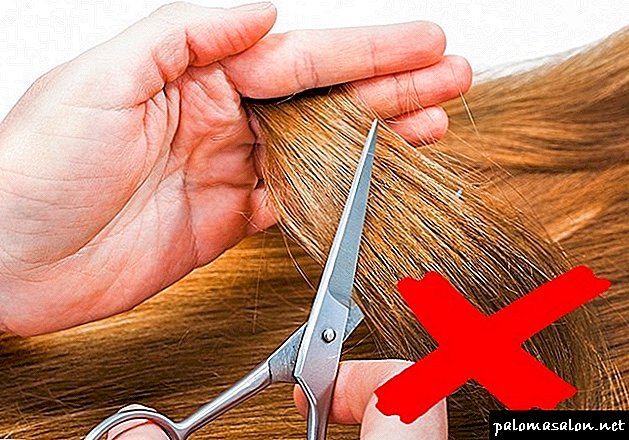
Step 7. We hide the elastic near the face under the hair or carefully cut it with nail scissors.
Step 8. You can leave the weaving strict, and you can stretch it slices with your hands. Naughty hair should be sprayed with varnish.

See video for more details:
At first glance, it seems difficult, but a detailed pattern of weaving will help you quickly cope with this task.
- Combing the side parting and throwing all the hair on one side.
- We begin to weave a standard French braid.
- Weave it down behind the ear, grabbing the hair horizontally from the opposite side. Carefully ensure that the braid falls smoothly down.
- When all the hair is woven into a braid, we tie it up with a rubber band.
- Sprinkle all varnish.
- Weaken weaving, stretching it with your hands.
Such weaving is performed on long and medium hair, which allows you to get a very beautiful French pigtail.
The French braid, on the contrary, visually increases the amount of hair and looks even on not very thick hair.
- We take part of the hair from the face and divide it into 3 strands.
- Tu strand, which was on the right, put under the center. That which remains to the left, we pass under the right. Now it has become central.
- (a, b) We shift the left strand under the middle one and add hair to it on the left side.
- Now skip to the middle right strand, adding hair to it on the right side.
- We continue to weave braid on this principle.
- So we collect all the hair and finish weaving back simple oblique. It is woven in the same way as usual, only the side strands are skipped below the middle one.
- Tie pigtails tied with a rubber band.
- Stretch the strands to give them volume.


Making such a return pigtail is not so difficult. Watch the video:
French bezel
Step 1. We comb the hair back or make a side parting on the left. We separate the wide strand for the braid, and the rest of the hair is twisted from behind so as not to interfere.

Step 2. Divide the part of the hair in a horizontal parting from one ear to the second. One of them will serve as the basis, but from the second we will weave loose strands.

Step 3. We weave the French braid from the right ear to the left or vice versa. Weaving can be classic or reverse.


Step 4. We dangle the braid to the right ear, tie it to the tail, or end it with the usual three-row braid. The tip is hidden under the bulk of the hair.

Simple, but beautiful styling is perfect for every day.
1. In the middle of the head we take a wide strand - from the face to the nape. The rest of the hair is better to stab crabs, so as not to interfere.
2. We begin to weave a braid, gradually adding hair from both sides.

3. Reaching the neck area, tie the hair in a ponytail.
4. Loose hair on the right is wrapped around the elastic. The tip is fixed invisible.

5. Do the same with the hair on the left side.

Spit in French four strands
This luxurious hairstyle is a great option for an evening out. To some it seems too complicated, but after learning from our master class how to weave a four-strand French braid, you will see that this is not at all the case.
- Divide hair into 4 equal parts.
- The second one to the left is flung under the next two, and then transferred over the far right strand. Now the first part on the left side is located in second place.
- We transfer the extreme strand on the right to the two adjacent ones and skip the second one from above.
- To the extreme strand on the left we attach a new part of the hair and again let it pass under the two adjacent ones and on top of the extreme.
- To the extreme strand on the right, add a new part of the hair and skip it under the adjacent strands and on top of the second.
- By this principle, we continue weaving a four-spit braid. The tip is tied with a rubber band.

See also: 3 fashionable braids for every day
French Waterfall Spit
This type of pigtail is an ideal hairstyle for a prom or other holiday that you can do yourself. By twisting the falling strands, you will look like a Greek goddess.
- We comb the hair and start weaving, just like a regular French braid, just on the side. Weave this way to the ear.
- Further, to the right strand separately we capture another bundle of hair from the crown, cover it with the left strand and lower the strand down to the right.
- We continue to weave in this way: adding a new strand and releasing the right.
- Weave to the desired end and we fix invisible.
It is possible to weave in this way only half of the head, or completely weave a wreath. Light curls - it is always an appropriate addition to this hairstyle.


Braid "bezel"
Perfect hairstyle for those who always want to look perfect, but does not have enough time. Hairstyle is done quickly and easily, and most importantly looks very fashionable.
- Parting on the parietal part of the head from ear to ear.
- Hair behind the braid in the tail, so as not to interfere.
- We start to weave at the edge. We take three strands and weave a regular or external French braid, adding an additional tuft of hair only to the lower strand on one side.
- Thus weave to the end and fasten the pigtail with an elastic band.
- If the length of the hair allows, you can simply braid one pigtail from the bottom of the hair and make a bezel from it, throwing it over the head.


"Fish tail"
Another version of the French braid, which does not require much effort and looks unusual and original. This braid can be weighed as a spikelet, as a pigtail of a tail, or as an addition to a more complex hairstyle.
- Divide combed hair into two even parts.
- On the one hand, we separate the thin strand and cross it at the back of the head with the second part of the hair.
- We do the same on the other side, separating the thin strand and crossing it with the second half of the hair.
- We spin this way to the end and secure with a rubber band.


"Air Spit"
This hairstyle is suitable for even long hair. You can do it on loose hair, and on the tail. It is also called the "skeletal" or "chain." The highlight of this braid is its lightness, so you do not need to do it if you have a very physically active day ahead.
- Smooth or pre-straightened hair combed back.
- We take three thin strands: one on top and two at the temples. We cross them once into a regular pigtail.
- Next, each time we take new thin strands on the sides, leaving the rest of the hair below.
- You should get a pigtail that lies loosely on the rest of your hair.
How to braid two French braids on the contrary.
Two French tresses on the contrary will look even more elegant and unusual at once. To create such a hairstyle you need a little more time, patience and attention, but it's worth it.

- Preparation of hair occurs in the same way as in the first version - the hair must be clean and dry, and a styling agent is applied.
- Next, the hair is divided into two equal parts. Make sure that the parting is even, then the hairstyle will look much better.
- We take one part of the hair and braid the French braid on the contrary, as shown in the instructions above. To the hair of the second part did not interfere, they can pick up a rubber band.
- When the first braid is finished, proceed to the second. The second braid should be identical to the first one, so more attention and accuracy will be required here.
- Upon completion, the hairs are smoothed and sprayed with varnish. For the volume, you can add braid loops before fixing with varnish.
How to weave a braid waterfall?
 About how to weave a braid - a waterfall in different versions and with secrets we will examine in detail with the photo and video tutorials in the article.
About all the options from the waterfalls of 3 curls and 2, as well as a lot of videos and photos, will help to master the waterfalls, even for beginners.
It's time to start creating a simple and at the same time elegant and refined hairstyle, while it fits both loose curls and braided braid.
Make a horizontal parting from ear to ear. Weaving is pretty free. The peculiarity of such a braid is that it is necessary not only to add braid to the strands, but also to release them.
The thickness of your braid does not change. When the weaving is over, the braid should be fixed with an original hairpin or simply invisible. If desired, the waterfall can be made difficult.
When one braid is braided, just below it, take another wide horizontal strand, divide it into three more thin ones, and weave the second tier so that the hairstyle looks more gently, curl the lower strands with a curling iron.
Bright video with detailed steps of weaving braids waterfall from Lily Moon
Learn and start to apply now to surprise your friends and try to add a novelty to your range.
Spit - zigzag, snake - this is an original and stylish hairstyle, thanks to which you will become simply irresistible.
Part on the side, take a strand from the thinner side, divide by three, and begin to weave, gradually shifting.
When you reach the other side, make a smooth turn. At the same time, you should stop grabbing strands from the side you are turning into. If hair length permits, you can make another turn.
If the hair is of medium length, then after finishing the braid to the base of the neck, simply form a bundle from the remaining hair.
The video shows all the steps to create a zigzag hairstyle.
It is not necessary that the French braid was dense, and had clear contours. With the help of a simple technique, you can create an incredibly beautiful hairstyle. Openwork braid quite often becomes the choice of brides. She looks very stylish, elegant. Nothing is required to create it.
All that is needed is to braid a reverse French braid. At the same time it should be rather soft - that is, it should not be woven tight. After the weaving is finished, gently pull the thin locks out of the side strands. That is, the spit significantly increases in volume, acquires ease, openwork.
There are several different principles of weaving openwork braids. After reading them, you can easily create original and beautiful hairstyles, spending quite a bit of time on it.
Types of openwork braids and the rules of their weaving in this video.
Video lesson on weaving two braids on the sides with the released strands
 Did you like to weave braids and would like to try to make a masterpiece? For example, the crown of hair for the new year or wedding. Detailed master classes will tell you how to make a hairstyle a crown of hair, and photos and videos will help you learn weaving quickly and repeat now.
The larger and wider the braid, the more spectacular it looks. How to make any braid volumetric? Learn all the secrets at this address.
Some girls feel awkward about braiding themselves when their hair is loose. They crumble, and it is quite difficult to lay naughty strands into a beautiful haircut. To avoid discomfort, pre-assemble hair in a high horse's tail. Then apply one of the many techniques of weaving.
The video shows in detail and in detail how to make a French braid from a tail.
Air spikelet?
This type of French braid looks best on even hair. If your curls curl a little bit, you should use a flat iron before weaving. The peculiarity of this braid is in its lightness. To braid a spikelet:
select a thin strand over any temple, and begin to weave. At the same time add strands only from the side that is larger. From the temple, above which you took a strand, a thin pigtail goes down.
It is convenient to weave such a braid: from the side, in the middle or from the tail, the main thing is to observe lightness.
Spit air spike with step-by-step explanations in this video: